
A well-planned bathroom lighting design transforms a basic space into one that makes your daily routine better. Your bathroom needs precise lighting so you can groom, shave, and apply makeup with confidence. Many homeowners don’t realize how much a smart lighting plan matters in this crucial room.
The best bathroom designs blend three lighting layers: ambient, task, and accent. This integrated system works beyond pure looks – it serves all the activities in your bathroom space. Task lighting near your vanity should provide 800 to 1,200 lumens per fixture when you need precision. Ambient lighting sets the base illumination level throughout. This piece shows how these layers combine to create a space that looks great and works even better for your daily needs.
Understanding the 3 Layers of Bathroom Lighting
“Good lighting design is about creating layers of illumination that complement each other.” — Unknown, Attributed in professional lighting design context
The concept of layered lighting changes ordinary bathrooms into exceptional spaces that serve practical and aesthetic purposes. Your bathroom lighting scheme needs a clear understanding of how these three distinct layers work together to achieve balance and functionality.
A successful bathroom lighting plan combines multiple light layers to create a balanced and functional space. Like a chef blending ingredients for a perfect dish, layered bathroom lighting mixes different light sources that achieve both beauty and practicality. Let’s explore each layer in detail.
Ambient lighting: the foundation of brightness
Ambient lighting works as your bathroom’s primary light source and fills in where natural light falls short. Picture it as a canvas where you’ll paint the rest of your lighting design. This foundation layer creates an overall glow that fills the bathroom and gives base-level visibility throughout the space.
What is ambient lighting?
Ambient lighting brightens the entire room. It creates the mood and helps with safe navigation, especially in bathrooms without natural light. This general lighting stays uniform and creates a comfortable, warm atmosphere that makes your bathroom an ideal place to unwind and rejuvenate.
Your ambient lighting plan should start with the natural light coming through windows and skylights. Check how well daylight fills the space, and note areas that need more light. You should also think about how much light the space needs after sunset.
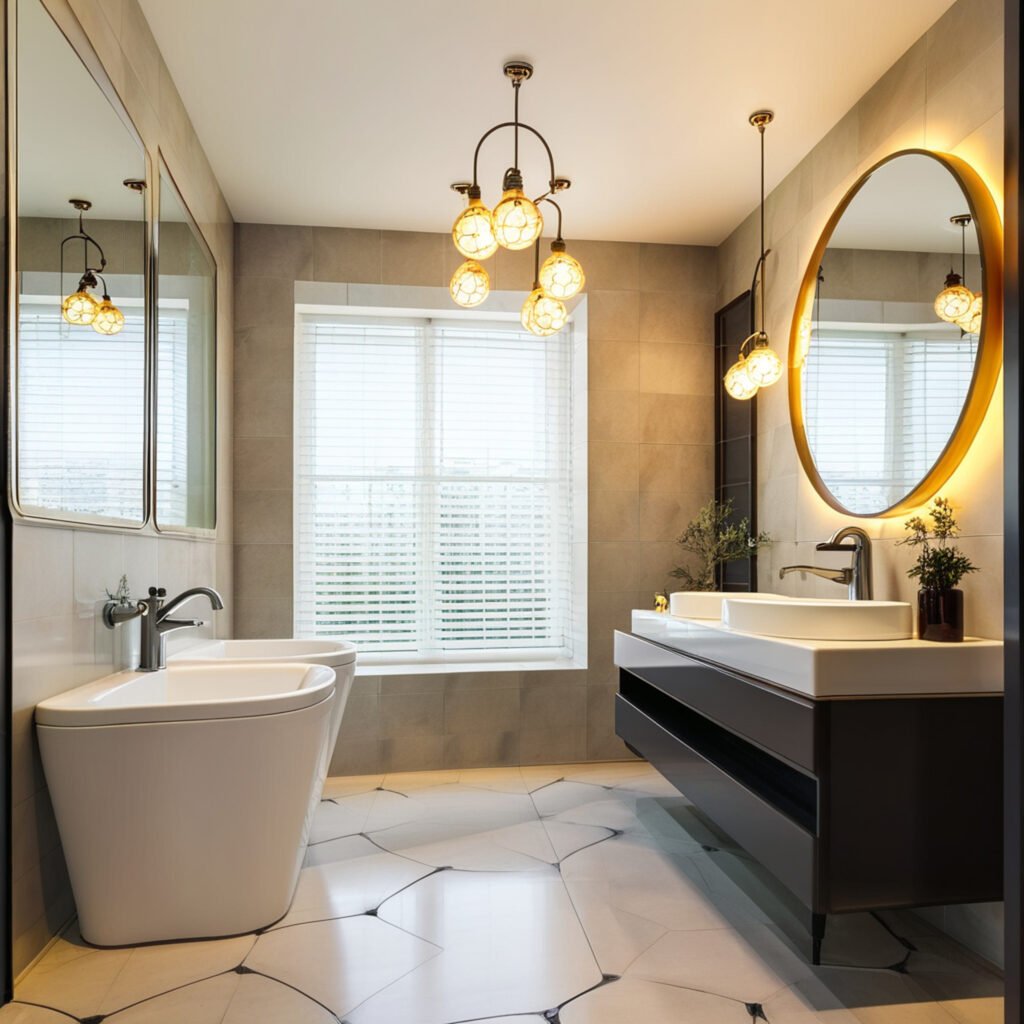
Common ambient lighting fixtures include:
- Ceiling-mounted chandeliers or fixtures
- Recessed ceiling lights
- Flush or semi-flush mount fixtures
- LED panels
- Hidden rope lights behind crown molding
Ambient lighting becomes your primary light source in the bathroom. Overhead light fixtures, like flush mounts and recessed LED lights, can achieve this. These fixtures fill your bathroom with consistent general illumination that serves as an excellent base to build supporting lighting.
Your recessed lights should follow this rule: keep lights two feet away from walls and space them half the ceiling height apart. A dimmable ambient light in your bathroom design will help create a bright, energetic space in the mornings and a soft, warm ambience at night.
Task lighting: focused light for daily routines
Task lighting lights up specific areas where you perform daily grooming activities. This type of lighting focuses on function and provides targeted light to help with specific activities like applying makeup, shaving, or styling hair.
Why is task lighting essential?
Task lighting plays a vital role in bathroom practicality and safety. Mirrors, sinks, and showers need bright, focused light to help with grooming, makeup application, and shaving. Poor task lighting can create shadows that make precision grooming difficult or dangerous.
Great task lighting should remove all shadows from important areas, which often need multiple fixtures. A single light above the mirror casts shadows on your face and makes grooming harder. Lights placed on both sides of the mirror, or combined with the upper light, eliminate shadows and make tasks easier.
Best practices for task lighting placement:
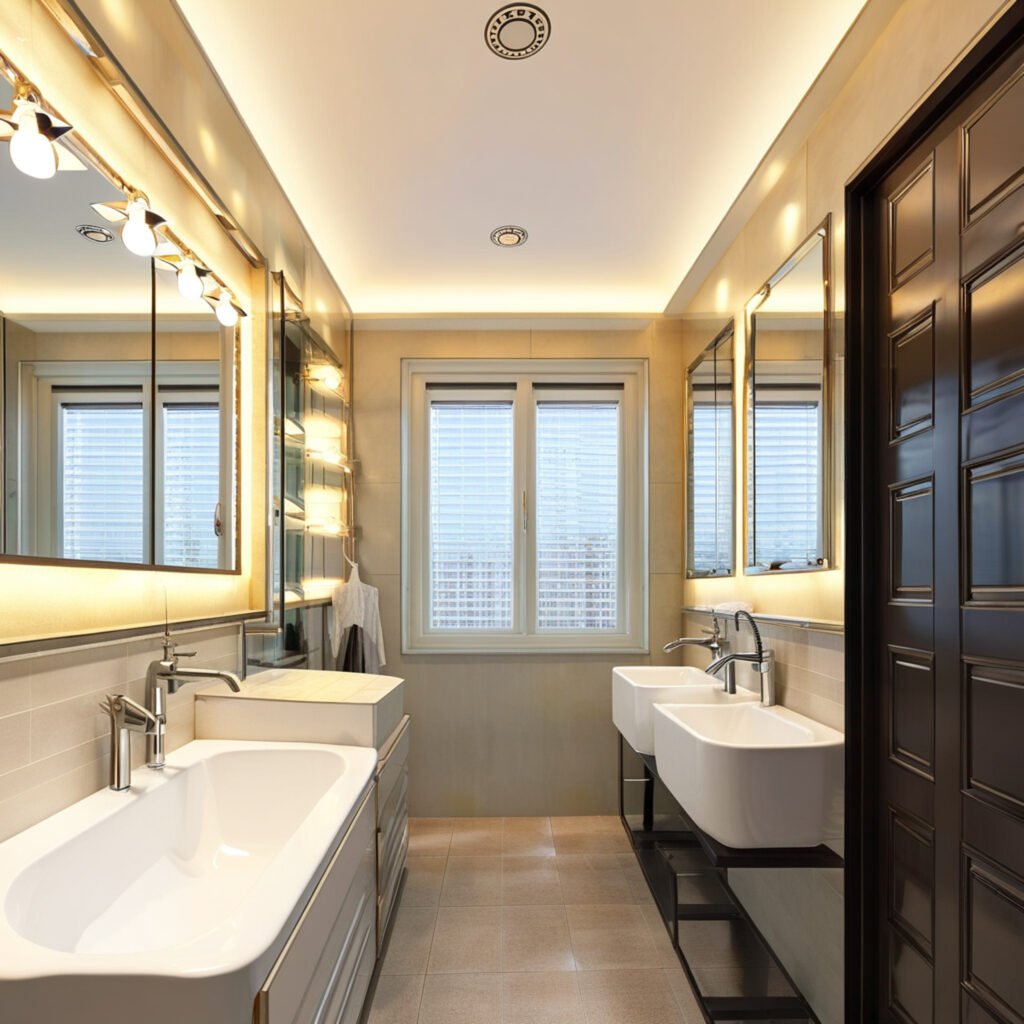
Task lighting works best when it lights your face evenly without harsh shadows. Vanity lights on the mirror’s sides rank among the most common task lighting choices. LED fixtures on both sides or above the mirror give plenty of shadow-free light that helps you complete tasks easily.
The best setup uses vertical sconces next to the mirror or LED panels built into the mirror’s frame. These fixtures work best at eye level, about 65 to 70 inches from the floor. Your choice between vertical and horizontal vanity lighting should focus on lighting your face evenly and removing shadows that might interfere with mirror tasks.
Technical specifications matter:
Quality vanity lights for bathrooms deliver 800 to 1,200 lumens per fixture and feature a color rendering index (CRI) of 90 or above for natural skin tones. Frosted or opal glass shades help soften brightness while keeping focus.
Natural daylight gives the best makeup lighting, so use windows and skylights when you can. LED fixtures or vanity bulbs without colored tints offer great alternatives for makeup application at different times if natural light isn’t available.
Shower areas might also need task lighting. Wet-rated recessed lights can brighten your shower space if you lack windows or natural light.
Accent lighting: adding depth and drama
Accent lighting creates depth and visual interest by highlighting specific features or decor elements. This third layer makes focal points around your bathroom’s design and adds dimension to decor. While not essential for basic function, accent lighting lifts your bathroom’s look and creates luxury.
Purpose of accent lighting:
Accent lighting shows best results when the focal point light shines three times brighter than the surrounding areas. These lights also help as secondary sources to remove gloom and light up spots that the ambient light misses.
This lighting style showcases architectural features, textures, colors, and other design elements. It draws attention to key features like artwork and mirrors in window displays, display cases, and decorative items.
Where to use accent lighting:
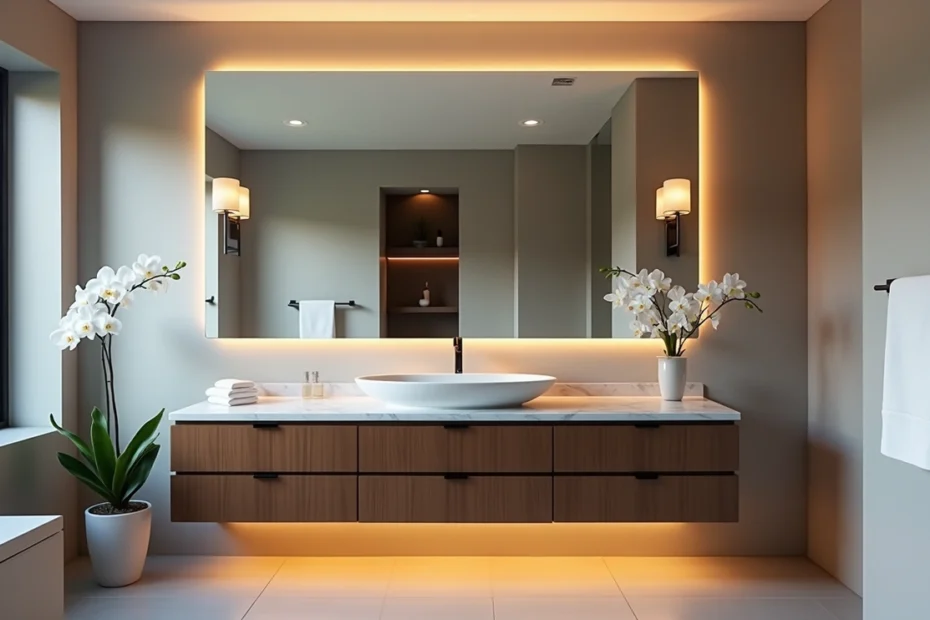
Accent lighting adds subtle depth that shows off your bathroom’s distinctive character. Options include under-cabinet LED tape lighting, directional mini-spots for textured walls, or backlit mirrors with soft halo effects.
Creative accent lighting applications include:
- LED strip lights under vanity cabinets
- Small spotlights directed at textured tile work
- Illuminated niches or shelving
- Cove lighting around architectural features
- Toe-kick lighting at cabinet bases
These low-lumen fixtures, usually between 50 and 300 lumens, should complement rather than compete with main lighting. Accent lights need focus and brightness. Their light should stay on decorative elements without casting shadows elsewhere, creating beautiful illumination that’s neither too bright nor harsh.
Design impact of accent lighting:
Accent lighting can showcase finishes like stone countertops or metallic faucets to reinforce material richness. These touches spotlight your bathroom’s craftsmanship and styling choices, creating statement features.
Large bathrooms should limit accent lights to one or two interesting areas or decorative elements. Place small lights over artwork or around notable architectural elements to draw attention naturally.
Strip lights or under-cabinet lighting highlight key features while providing perfect ambient light. Accent lighting helps define spaces in larger bathrooms and adds style. It creates soft, subtle light that both brightens the room and boosts its overall appearance.
Bringing the layers together:
Like interior designers layer colors or fabric, lighting designers use ambient, accent, and task lighting to boost a room’s visual appeal. Thoughtful layering of these lighting types improves both bathroom function and sophistication.
Layered lighting strategies can change a room’s function effectively. Your layered bathroom lighting design works best when you understand each layer’s contribution. Create a plan that considers all activities in each bathroom area.
Begin with ambient lighting for overall visibility, add task lighting around the vanity and mirror, then use accent lighting for design features. This approach makes your bathroom lighting both practical and beautiful.
A bathroom lighting scheme needs proper ambient, task, and accent lighting. This layered method lets you adjust lighting based on time, mood, and activity. Dimmer switches on ambient light sources give you more control over the desired atmosphere.
Good bathroom renovation lighting balances all elements through careful layering. The combination of ambient, task, and accent lighting adds depth, warmth, and functionality to this essential home space. Beautiful and practical spaces emerge from good bathroom lighting design.
How to Layer Lighting in Your Bathroom
Creating a great bathroom lighting design goes beyond picking beautiful fixtures. You need a smart layered approach that works well and sets the right mood. I’ve found that knowing where to put each light makes the difference between an okay bathroom and your own personal spa retreat.
A layered lighting plan needs smart thinking and the right placement. Let’s see how you can transform your bathroom with lights that look good and work even better.
Start with ambient lighting for overall visibility
Ambient lighting is the backbone of your bathroom’s light setup. You should check your bathroom’s natural light and spot areas that need extra brightness before installing any fixtures.
Step 1: Choose the right ambient fixtures. Start by picking ceiling lights that will light up the whole space evenly. Your bathroom’s size and style will help you pick from these options:
- Flush-mount ceiling fixtures or recessed LEDs for even, consistent light
- Semi-flush mount fixtures for bathrooms with higher ceilings
- Decorative chandeliers for larger bathrooms, especially over freestanding tubs
- LED panels for a modern, streamlined look
Step 2: Position fixtures strategically. The right placement makes ambient lighting work better. Here’s a good rule for recessed lights: keep them at least two feet from walls and space them apart by half your ceiling height. This stops harsh shadows and spreads light evenly through the room.
A medium-sized bathroom usually needs 4-6 recessed lights for good ambient lighting. Put these lights to cover the whole floor, with extra focus on the shower, toilet, and walking areas.
Step 3: Plan for adequate brightness. Your ambient lights should be bright enough to move around safely and comfortably. Look for fixtures that give about 70-80 lumens per square foot for good general lighting. This means a 100-square-foot bathroom needs 7,000-8,000 total lumens from ambient sources.
The setup phase needs close attention to technical details and placement. Center ceiling fixtures over plumbing when you can, with the centerline 72″ above the floor. For taller ceilings or family members, you can go up to 80″, but no higher for the best effect.
Add task lighting around the vanity and mirror
After setting up your ambient lighting base, focus on task lighting—especially around the vanity where you need to see clearly.
Determine optimal vanity lighting placement. Your vanity lights’ position makes a big difference in how well they work. Put sconces at eye level (about 65-70 inches from the floor) on both sides of the mirror to avoid shadows on your face. This cross-lighting gives you even light from different angles, which helps with grooming tasks.
When using two sconces beside your mirror, put them 3-6 inches from the mirror’s edge for balanced light. The fixtures should be slightly smaller than your mirror’s width or height to look right.
If you can’t put sconces on the sides, try these options:
- A horizontal light above the mirror (at least 78 inches from the floor)
- Backlit mirrors with built-in LED lighting
- Vertical bath bar lights on both sides of the mirror
Select appropriate task lighting fixtures. Pick fixtures that give enough light for vanity areas:
- Wall sconces with frosted or opal glass to soften the light
- LED vanity lights that give bright, clear light for grooming
- Vertical sconces that spread light evenly across your face
Quality vanity lights should give 800 to 1,200 lumens per fixture with a color rendering index (CRI) of at least 90 to show skin tones naturally. This matters a lot for makeup and grooming.
Common Bathroom Lighting Design Mistakes to Avoid
“Lighting should be designed to complement people, not just the architecture.” — Unknown, Attributed in professional lighting design context
Beautiful bathroom fixtures can fall short when the lighting design misses the mark. My experience with numerous bathroom renovations has shown several lighting mistakes that affect both function and appearance. You can avoid disappointing results and pricey fixes by addressing these common issues early in your planning.
Using only one type of lighting
One of the biggest problems in bathroom lighting design comes from using just a single light source. A lonely ceiling fixture or just vanity lights won’t give your bathroom the light it needs. “Relying on just one overhead light casts shadows and makes tasks like shaving or makeup tricky,” notes interior design expert Andrea Schumacher. This basic approach leads to uneven lighting and dark spots in key areas.
Most homeowners stick to ceiling-mounted fixtures as their only source of light. But this approach doesn’t provide enough light to groom properly. Overhead lighting by itself creates unflattering downward shadows that make detailed tasks nearly impossible. These shadows can hide important details when you’re applying makeup or shaving.
The same goes for using only vanity lighting. Schumacher points out that vanity lights alone can create “unflattering shadows” in other parts of the bathroom. You shouldn’t have to pick between overhead or vanity lighting—the best solution combines both with accent lighting for a detailed lighting plan.
Poor lighting does more than just inconvenience you. Your eyes might strain and you could make grooming mistakes because you can’t see well enough. Bad lighting can shake your confidence as you start your day. Single-source lighting also creates harsh contrasts between bright and dark areas, making it impossible to see your face clearly.
Placing lights that cast shadows on the face
The most annoying bathroom lighting mistake happens when vanity lights sit in the wrong spot. People often put lights right above the mirror, which creates unflattering shadows on their faces. Interior designer Lesley Myrick suggests avoiding fixtures directly above your vanity. The best setup uses sconces at eye level on both sides of your mirror.
This setup works much better. Side-mounted sconces “will shine even, flattering light on your face, ideal for your skincare routine or makeup application”. Light from both sides gets rid of shadows under your brow, nose, and chin that usually come from badly placed lighting.
Here’s how to place your fixtures:
- Mount wall lights at eye level (approximately 65-70 inches from the floor)
- Put sconces on both sides of your mirror instead of above it
- Point the light toward your face rather than the mirror to avoid glare
Using just one sconce between two mirrors is another common error. This setup won’t light both mirrors evenly. Design pros suggest that “You want to make sure you’re being evenly lit when looking into a bathroom mirror, so add a sconce on each side or opt for LED-lit mirrors“.
The science behind this placement is simple. Multiple light sources working together minimize or eliminate shadows. Task lighting works best when it lights up your face evenly without harsh shadows.
Ignoring dimmer switches
Skipping dimmer switches means missing out on a key lighting feature. Without dimmers, you can’t control light intensity, which makes it hard to switch between bright morning routines and soft evening relaxation. Your bathroom becomes less versatile and comfortable.
Dimmer switches offer several benefits:
- Light adjustment for different activities boosts function and mood
- They help transition bright task lighting into soft ambient lighting—perfect for nighttime routines
- You’ll save energy by reducing light output when you don’t need full brightness
- Mornings and evenings feel more natural with gradual light changes
Dimmers do more than just add convenience. Research shows that many falls happen when older people use the bathroom at night, often because their eyes can’t adjust quickly between dark and bright light. Dimmed lights make nighttime trips safer while keeping things visible enough.
Adding dimmers isn’t always complicated. You can usually swap a standard switch for a dimmer if your lighting circuit works with it and the switch meets bathroom safety codes. Just remember that bathrooms need professional installation to stay safe and up to code.
Keep these technical details in mind for dimmers:
- LED bulbs need special “trailing edge” dimmers to work without flickering
- Check if your LED bulbs can dim before installing
- Putting dimmer switches outside the bathroom makes installation easier
Mismatched fixture finishes
The last common mistake shows up in mixed fixture finishes throughout the bathroom. While it might not seem as crucial as other issues, clashing metals and finishes can throw off your bathroom’s whole look.
Designers have long suggested matching finishes in bathrooms. This creates a unified look across all elements—from faucets and shower fixtures to lights and hardware. One expert suggests, “Whether you’re buying bar lights or sconces, match the finish to the color of your faucet hardware for a unified look”.
Matching finishes helps tie the room together visually. Random metal finishes can confuse the eye instead of creating a cohesive look. This often happens when renovations stretch out over time or when there’s no overall lighting plan.
Some designers now mix metals on purpose for an interesting look. This needs careful planning to look intentional rather than random. Even with mixed metals, keeping similar finish types (matte, polished, brushed) helps create unity.
Tips for choosing fixture finishes:
- Look at your existing plumbing fixtures and hardware
- Stick to either warm tones (brass, gold, copper) or cool tones (chrome, nickel, silver)
- Use no more than two or three finishes that work well together
- Put your main finish on the biggest or most noticeable fixtures
Your bathroom’s lighting design needs careful planning and attention to detail. You’ll create a space that looks great and works well by using multiple light sources, placing fixtures correctly, adding dimmers, and keeping finishes consistent.
Conclusion
A well-designed bathroom lighting setup can turn a basic space into a functional sanctuary that adapts to your daily needs. The 3-layer approach of ambient, task, and accent lighting offers a complete solution for both practical needs and visual appeal. These layers serve different purposes but work together to create a balanced lighting scheme.
Ambient lighting sets the base brightness level. Task lighting helps you perform daily grooming activities with precision. Accent lighting brings depth and visual interest to your bathroom. This combination removes shadows, shows off architectural features, and creates a welcoming atmosphere that improves your daily routine.
Dimmers are one of the most valuable additions to bathroom lighting design. You get full control over the mood and intensity of your lights. Your bathroom can shift naturally from bright morning light to soft evening ambience. This flexibility helps save energy and extends the life of your bulbs.
Your bathroom’s functionality and appearance will improve a lot when you avoid common lighting mistakes. Use multiple light sources instead of just one. Place vanity lights to remove facial shadows. Add dimmers for flexibility and keep fixture finishes consistent for visual harmony.
The best bathroom lighting combines technical aspects with your priorities. A properly layered lighting setup that steers clear of common mistakes creates a beautiful and functional space. These lighting principles will give you a more enjoyable, practical, and stunning bathroom that you’ll love using every day, whether you’re renovating or building new.