
Most homeowners don’t realize that bathroom updates cost way more than expected – about 64-percent more to be exact. I was definitely one of those hopeful homeowners until I found that there was a way to do bathroom updates without spending a fortune or taking forever.
The right approach lets you update bathroom fixtures and features over a single weekend. Many homeowners feel overwhelmed by bathroom upgrades. These projects are actually nowhere near as complex or costly as full renovations since they target specific elements. A few simple changes can reshape the scene of your bathroom without major heavy equipment rentals or renovation stress. Fresh paint on the walls and new lighting fixtures make a huge difference. In this piece, I’ll walk you through my weekend bathroom makeover story. My budget-friendly approach turned an average bathroom into something special through simple, doable changes.
Friday Evening: Planning and Prepping for the Weekend
My bathroom update project kicked off one Friday evening with vital groundwork. Thoughtful planning makes bathroom upgrades twice as likely to succeed.
Assess what needs updating
A thorough inspection of my bathroom’s current state came first. My approach focused on reviewing what worked and what needed changes, rather than rushing to buy new items. The inspection covered:
- Fixture condition and functionality
- Layout efficiency
- Lighting quality
- Storage capacity
- Ventilation effectiveness
My priorities became clear after listing essential changes versus desired upgrades. Questions helped shape the plan: Would a walk-in shower work better than a tub? Did the storage space meet my needs? The door’s swing path needed checking too. This review laid the groundwork for my weekend transformation plan.
Set a realistic budget and timeline
Complete bathroom makeovers typically cost between $6,100 and $16,600. Yet I found ways to make high-impact changes with just $300. My financial strategy included:
- Setting a budget that matched my priorities
- Adding 5-15% extra for surprises
- Identifying DIY tasks to reduce costs
The project timeline needed careful planning. Paint had to follow caulking, and flooring needed completion before fixture installation. My weekend timeframe meant focusing on quick, budget-friendly changes instead of major renovations spanning multiple weekends.
Gather tools and materials in advance
Project success depended on having all supplies ready before work began. My detailed list included:
- Simple tools: tape measure, hammer, screwdriver set, drill, level, and utility knife
- Project-specific items: caulking gun, paint brushes/rollers, and appropriate wrenches
- Materials: paint, primer, new fixtures, accessories, and decorative elements
Special items needed early ordering to avoid shipping delays. A dedicated storage space kept everything available and well-organized throughout the project. This preparation eliminated mid-project supply runs that could have thrown off my weekend schedule.
Saturday Morning: Quick Wins to Refresh the Space
I started my Saturday morning by making quick changes that would change how my bathroom looked without too much work. These easy swaps made a big difference and didn’t hurt my wallet.
Swap out old hardware and knobs
My first task was to replace all the old hardware in the bathroom. I was amazed to find that hardware works like jewelry for your vanity. The change took just 15 minutes with a screwdriver.
My picks went together with one another:
- Cabinet knobs and drawer pulls
- Towel bars and toilet paper holders
- Shower rings and tub stopper
Beautiful solid stone and marble cabinet knobs from Etsy cost just $7 each. This showed me that new bathroom hardware doesn’t need to be expensive. I picked sleek chrome knobs for my vanity that added a modern look and matched my bathroom’s style.
Replace the faucet or showerhead
Next came my showerhead upgrade to a rainfall model. This change creates a spa-like feel in your bathroom and costs as little as $20 from Amazon and Wayfair. Here’s how I did it:
- Turn off the water supply
- Unscrew the existing showerhead
- Clean and dry the threading
- Apply plumber’s tape for a watertight seal
- Screw on the new showerhead
The whole thing took about five minutes and made my shower look and work so much better.
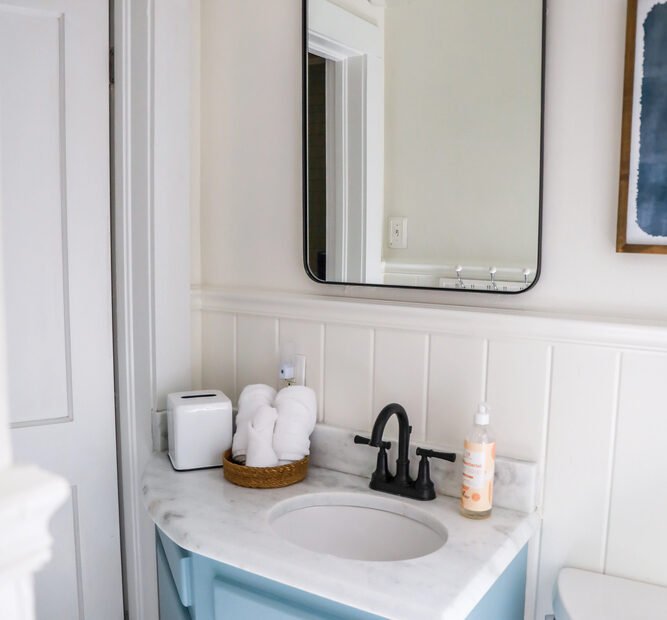
My faucet update took less than an hour. After I disconnected the supply lines and took out the old fixture, I put in a sleek single-handle model that gave my vanity area an instant modern look.
Add a new mirror or lighting fixture
The biggest change came from my new oversized mirror. It made my small bathroom look much bigger and bounced more light around the room. The mirror I chose was about two-thirds of my vanity’s length – perfect for the space.
A new simple tube light above the mirror gave me plenty of light without harsh shadows. Better lighting changed the room’s whole feel, which really helps with daily tasks like shaving or putting on makeup.
These morning projects gave my bathroom an instant facelift without needing special skills or lots of money. This success got me excited to tackle more weekend updates.
Saturday Afternoon: Style and Personality Touches

Image Source: https://pixabay.com/
Saturday afternoon arrived, and I was eager to move beyond the simple touches to add character to my bathroom space. This marked the moment when a functional room would become my personal retreat.
Install peel-and-stick wallpaper or wainscoting
Adding texture to walls creates an immediate visual effect. My choice was a peel-and-stick wallpaper designed for bathrooms that resists moisture and steam – perfect for humid spaces. The installation took under an hour, and the realistic marble pattern went together with my existing fixtures.
Wainscoting provides protection and style in equal measure. The traditional approach follows the rule-of-thirds (about 3 feet high on a 9-foot ceiling). I discovered that slightly shorter panels created an illusion of higher ceilings. Pre-cut panels and chair rail molding helped me create a custom look without needing special carpentry skills.
Lay down a new rug or bath mat
A fresh bath mat can dramatically update your bathroom’s appearance. I picked a plush, absorbent cotton mat that matched my new wall treatment. The placement matters:
- Near the sink to stay comfortable while brushing teeth
- In front of the shower to prevent slips
- Along the vanity as a narrow runner for elongated spaces
The Pottery Barn Classic Organic Loop Bath Mat in neutral tones added warmth underfoot and made the room feel larger.
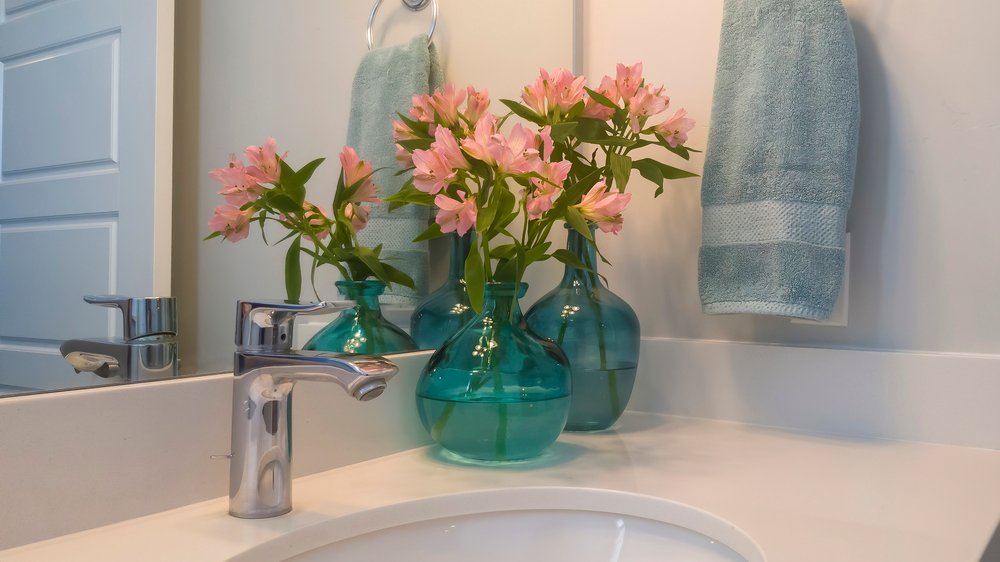
Add plants or framed art for a cozy feel
I wanted to create a spa-like atmosphere with carefully placed greenery. Humidity-loving plants flourish in bathroom environments and absorb vapor through their leaves to help regulate moisture. My selections included:
- Spider plants in macramé holders to free up counter space
- Boston ferns by the window for extra privacy
- Small succulents in matching pots on floating shelves
Framed botanical prints above the toilet completed the look. These touches transformed my updated bathroom into a thoughtfully designed space rather than just a functional room.
Sunday: Final Details and Functional Upgrades
Sunday came with the satisfaction of seeing my bathroom’s transformation take shape. The time had come to add those final touches that would raise the space from updated to completely refreshed.
Reorganize and declutter the vanity
The functional improvements make a huge difference in daily use, not just the esthetic changes. I cleared my cluttered vanity by taking everything out and sorting items into categories:
- Keep only items used daily in the vanity drawers
- Create a separate “catch-all” basket for occasional-use products
- Use drawer organizers to prevent items from rolling to the back
- Replace the pedestal sink with a small vanity cabinet to get more storage
Small basket organizers worked perfectly under the sink and freed up valuable counter space. A cute trinket tray caught drips and kept the counter clean for everyday essentials like toothbrushes and hand soap.
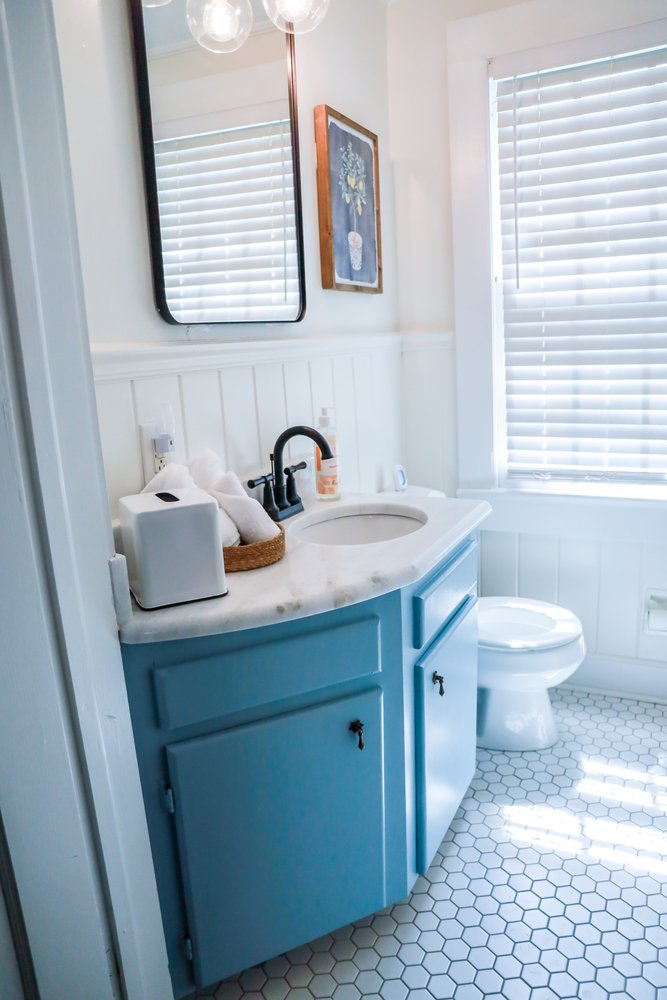
Install a bidet seat or frosted window film
I decided to improve both privacy and function. The Gila Frosted Privacy Window Film went on my bathroom window to solve the privacy issue. This adhesive film lets natural light through while providing 24-hour privacy. Its classic frosted design fits any décor and keeps a clean, sophisticated look.
A bidet toilet seat replaced my existing one to add functionality. The installation was simple:
- Turn off the water supply and drain the toilet
- Remove the existing seat
- Install the mounting plate and attach the bidet seat
- Connect the water supply using the T-valve
- Check for leaks and test
It took less than an hour to install everything. I didn’t need professional help—just simple tools and careful attention to instructions.
Touch up paint or color drench the walls
My final upgrade involved color drenching—painting every surface the same shade, from walls and woodwork to ceiling and radiators. This approach creates a cozy environment that feels bold yet harmonious.
Light shades worked best in my small bathroom. They made the space feel bigger and airier by softening the lines between walls and ceiling. This technique really shines in awkward spaces like narrow bathrooms.
Dead Flat finish paint made the colors look richer and more appealing. The monochromatic scheme cut down visual distractions from architectural elements. It set a calming tone throughout the space—exactly what I wanted to create that spa-like environment.
Conclusion
Final Thoughts: A Brand New Space in Just One Weekend
My bathroom makeover shows that big changes don’t need massive renovations or deep pockets. This weekend project taught me that good planning and smart updates can work wonders.
The groundwork I laid on Friday evening made everything possible. A full picture of what I needed, a realistic budget, and all materials ready to go saved me from rushed trips to the store later.
Quick hardware changes on Saturday made an immediate difference. The new faucet, showerhead, and decorative pieces gave the bathroom a fresh look without any special skills needed. My personal touches – from peel-and-stick wallpaper to carefully placed plants – turned this basic space into my own little getaway.
Everything came together beautifully with Sunday’s final touches. A decluttered vanity, new privacy film, and color-rich walls created that spa feeling I wanted.
This project really shows how little changes pack a big punch. Instead of spending thousands on a full renovation, my weekend bathroom update cost less than $500 but completely changed the space. The whole thing took just three days, and I’ll enjoy these changes for years to come.
You should think about doing a weekend update yourself, whether you’re selling your home or just want a nicer bathroom. Your money, time, and style will decide how much you do, but even small tweaks can make a huge difference. Bathrooms might be the smallest rooms we have, but they definitely deserve some love and attention.